Friday, October 4, 2019
App Showdown: Kahoot vs Quizizz
Monday, May 20, 2019
Google Sites Part 2
In this post, we are going to dive into part two of our Google Sites series. We are going to discuss some ways that you can customize your Google Site.
Adding a Logo
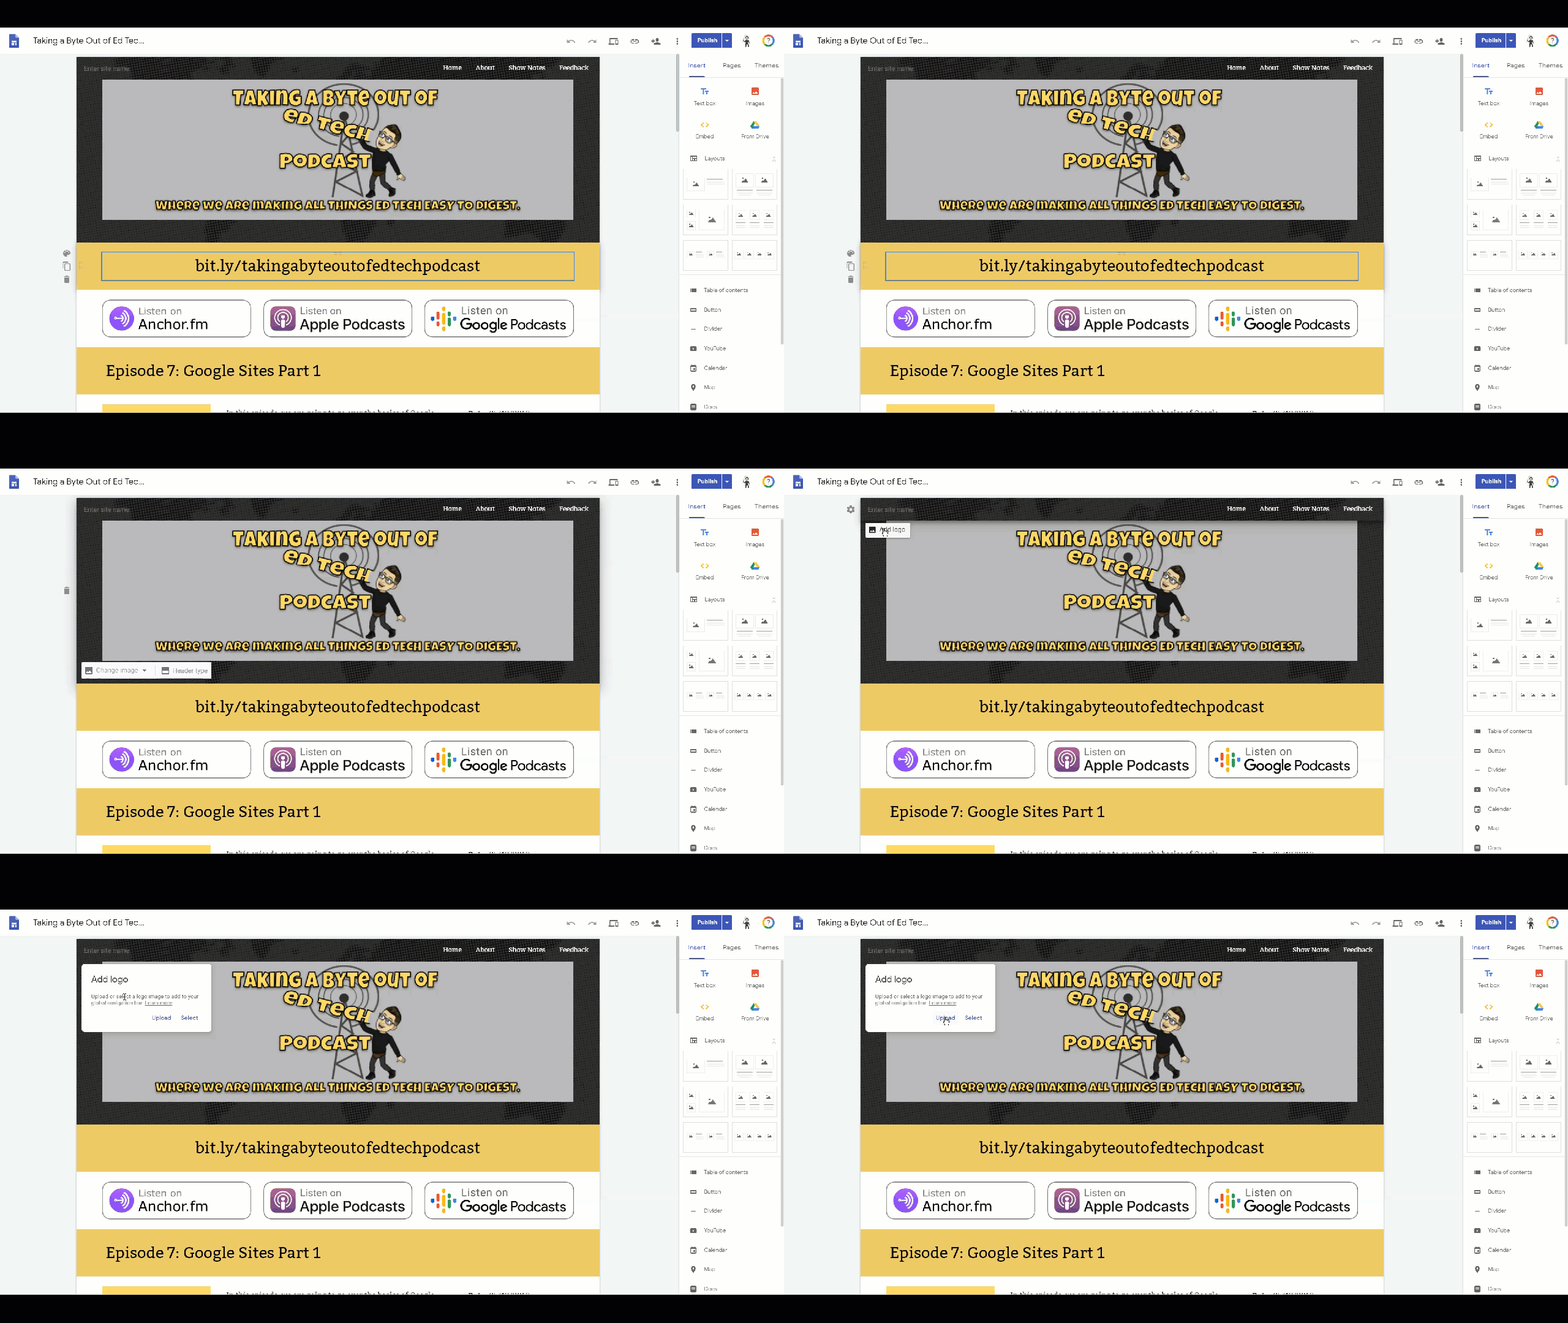
while in editing mode, simply head on up to the top left-hand side of the navigation bar at the top of your site and you will see a dialogue box that pops up that says Add logo. Clicking on it will bring up a box that asks you to either upload an image or select an image.
Customizing Accent Color
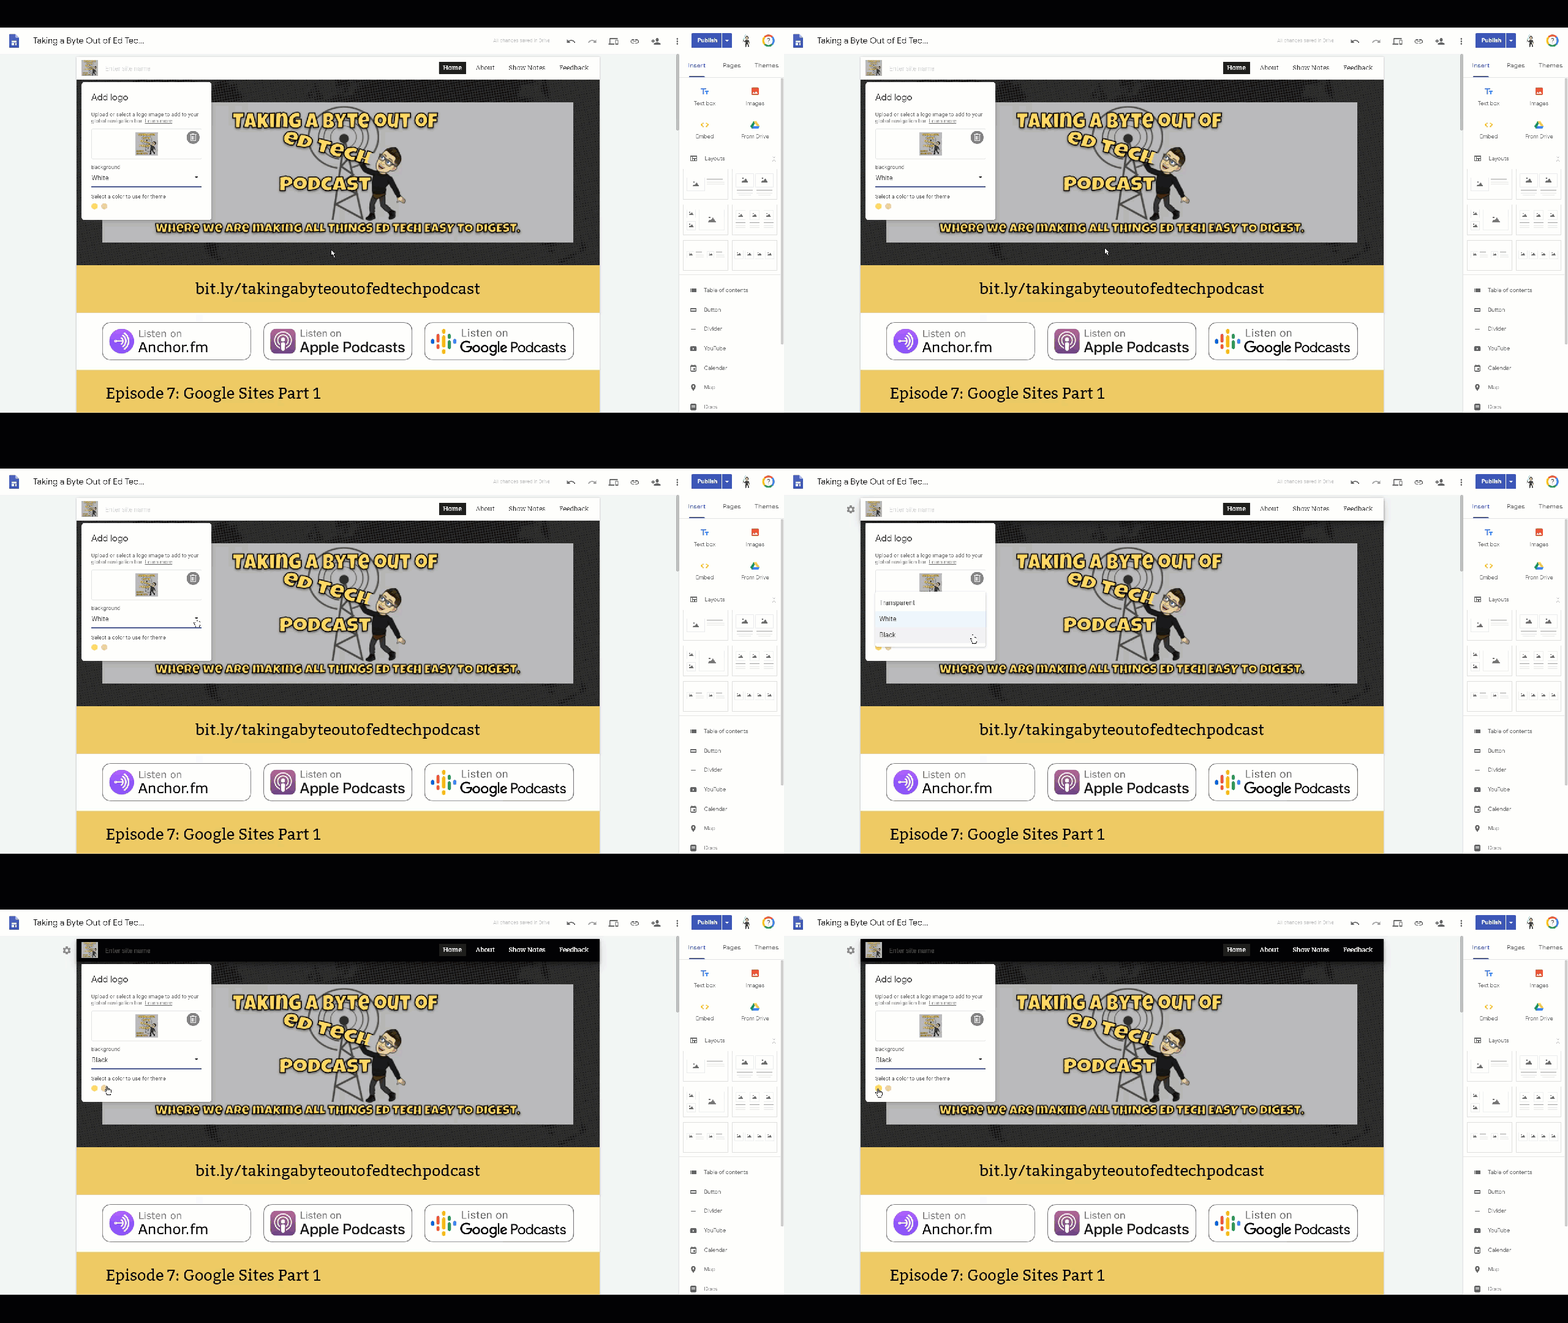
After you add your logo to your site, you will notice that you have some color options that you can now choose from.
Changing Header Image
To set a custom header image, hover over your banner and you will see a dialogue box with the following options: Change image, reset, and header type. Click on Change image. You then have the option to either upload an image or select an image.
Navigation
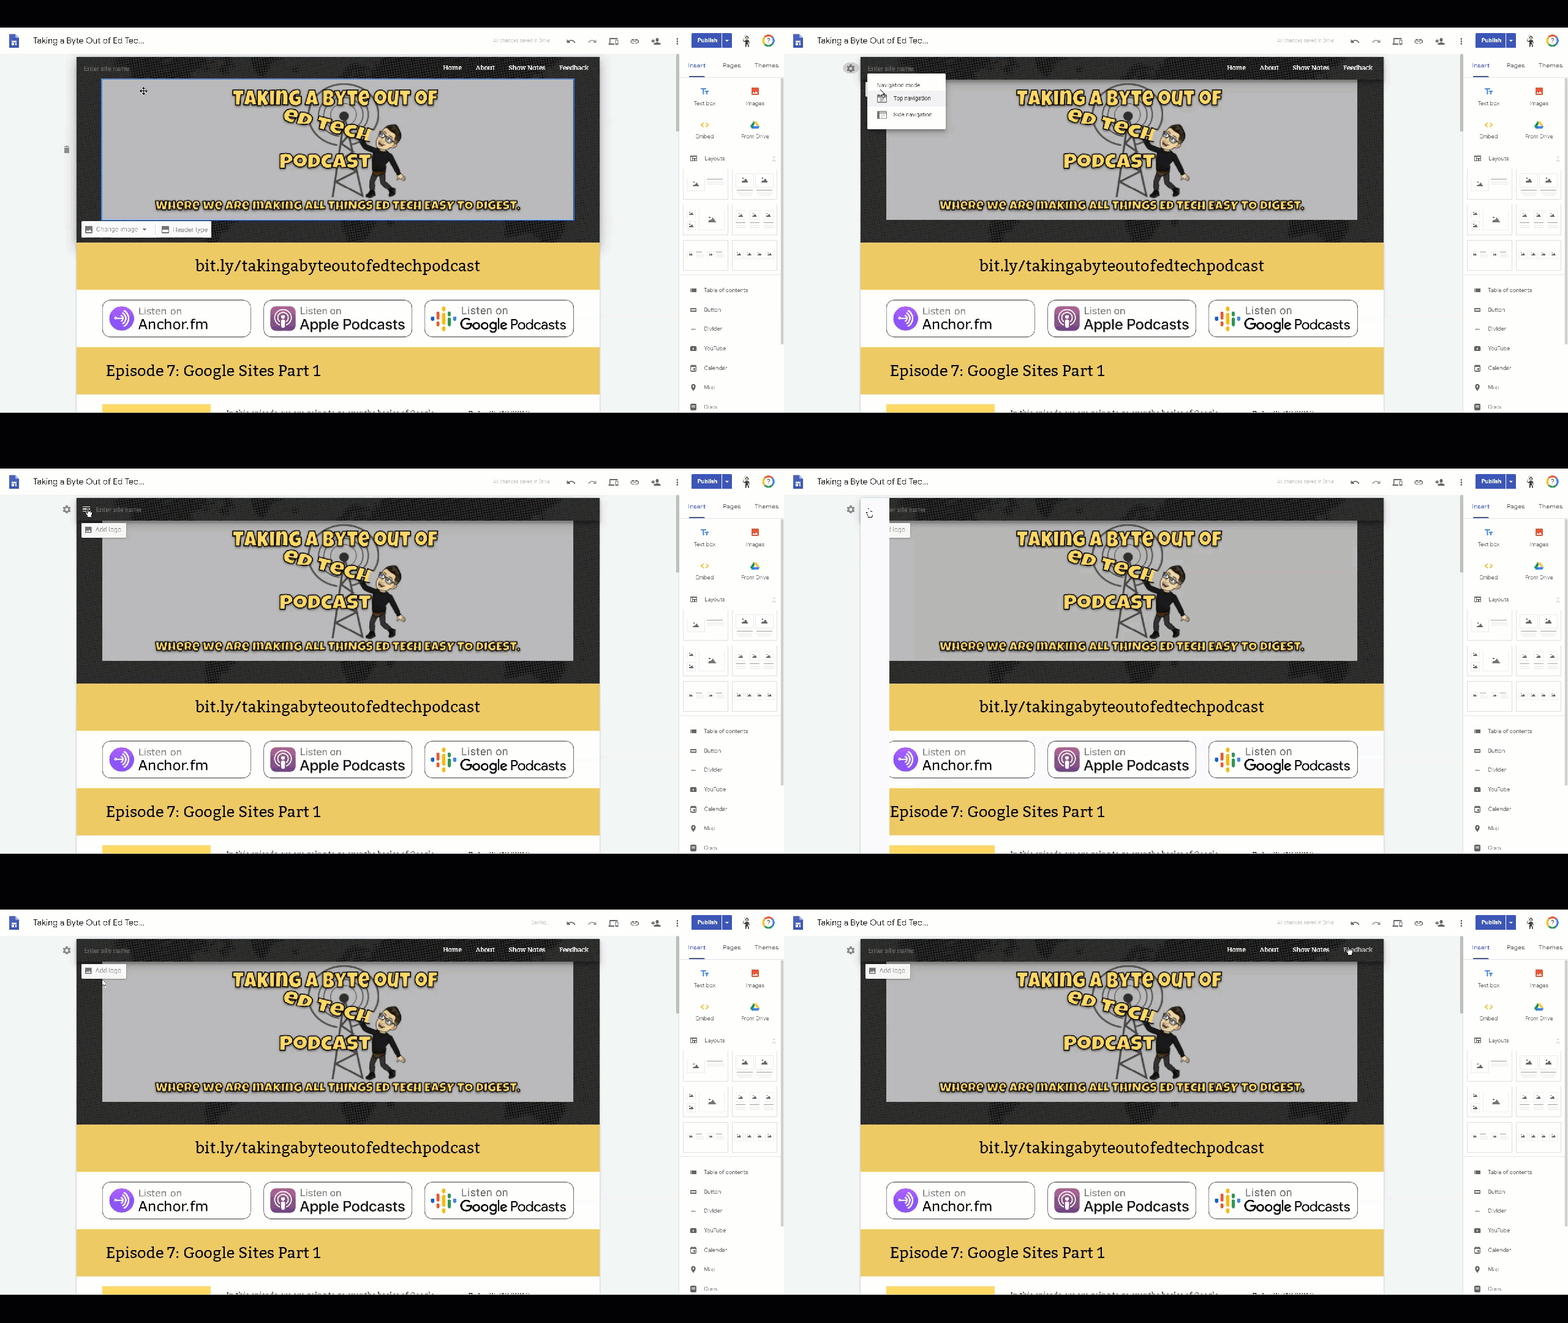
To change the navigation mode, hover over the navigation bar at the top of your site. You will see a settings wheel appear on the far left. Clicking on that settings wheel will allow you to choose between top navigation and side navigation.
Drop Down Navigation
To create drop-down navigation, head on over to the Pages section. You will see a list of all of your Pages. Drag a page onto another page and you will see a blue box appear around the page you are dragging onto. Drop your page and you will now see a down arrow next to the top page and the page that you dropped under that page. You will now see a down arrow next to the page title on your site as well.
Hiding Pages
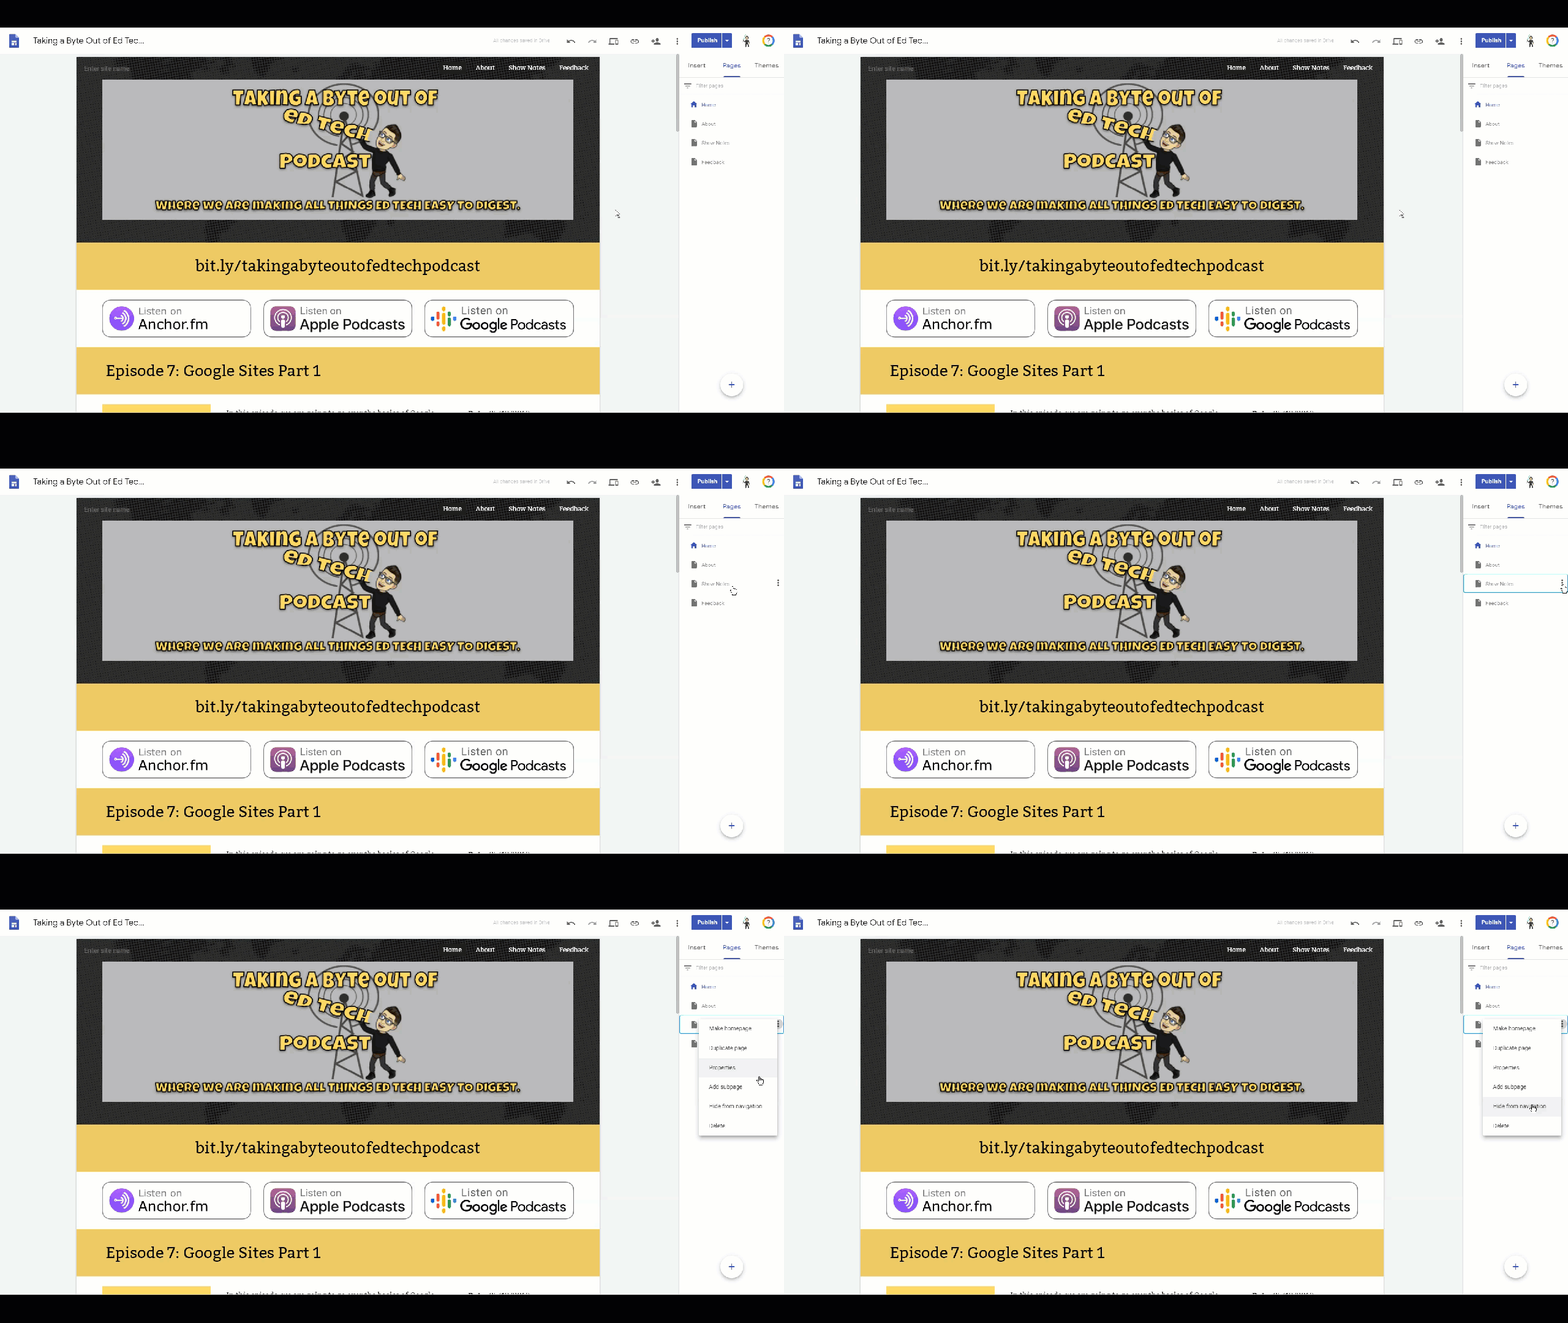
To first hide a page from navigation, click on the Pages section on the right-hand side, hover over the page you want to hide and you will see the vertical ellipsis, click on that and choose “hide from navigation”.
Adding Alt Text
To add alt text to an image, first click on an image that you have uploaded to your site. After clicking on that image, you will see the vertical ellipsis appear in the image options section. From there, you can choose add alt text. Adding alt text allows screen readers to access the image for people who might have trouble seeing the content on your site.
Monday, May 13, 2019
Google Sites: The Basics: Part 1
How to Create a Site
To create a new site, all you have to do is head on over to drive and click the “NEW” button in the top left-hand corner. You will see options like a folder, file upload, folder upload, Docs, Sheets, Slides, and more. Click more. From there, you will get a new drop-down menu. In there you will see Sites. Click on sites.
The Controls on the Site
Adding Content to Your Site
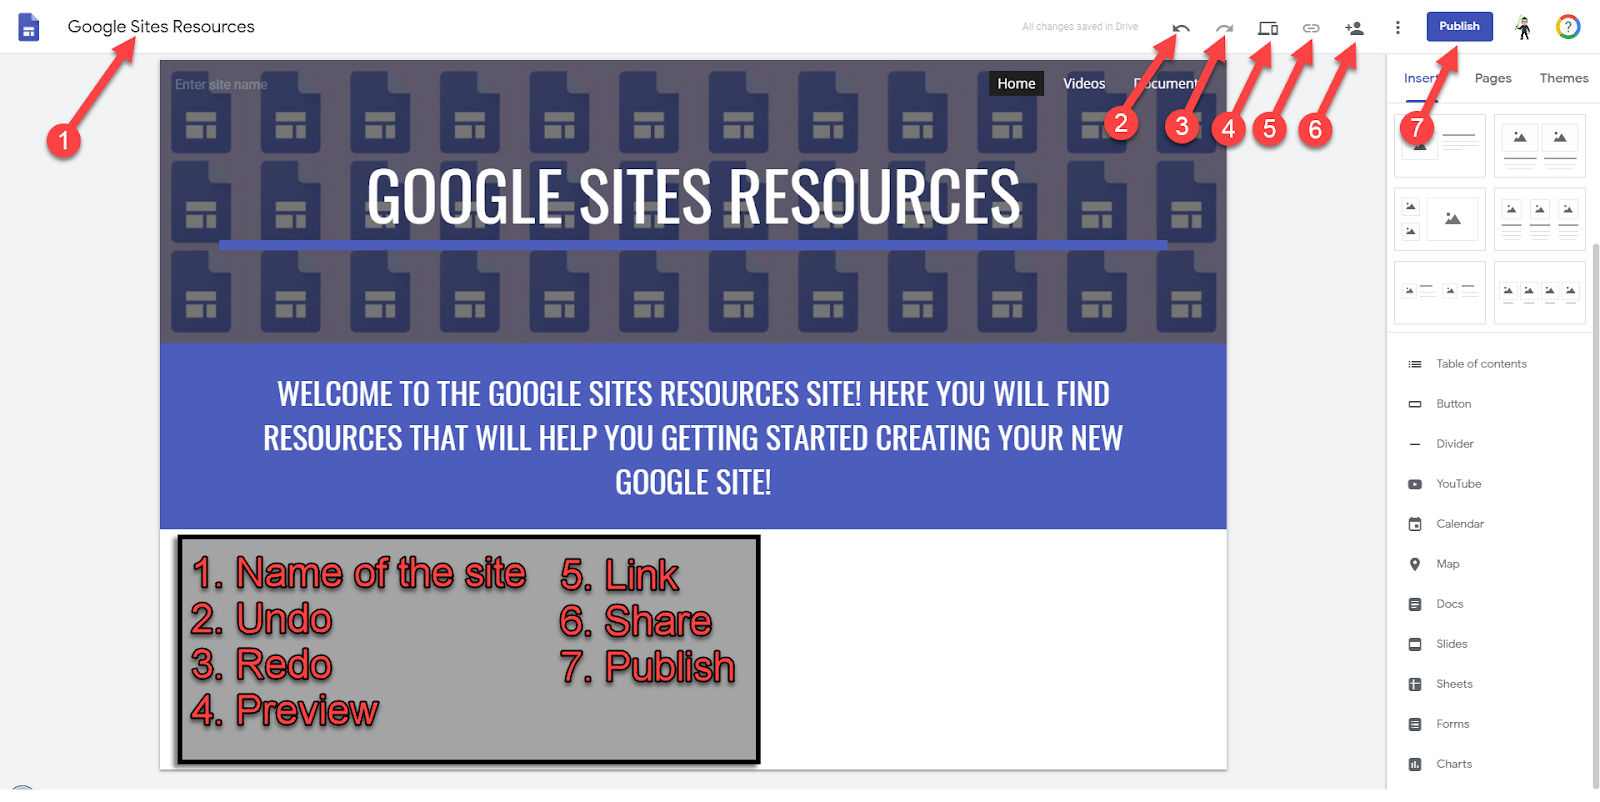
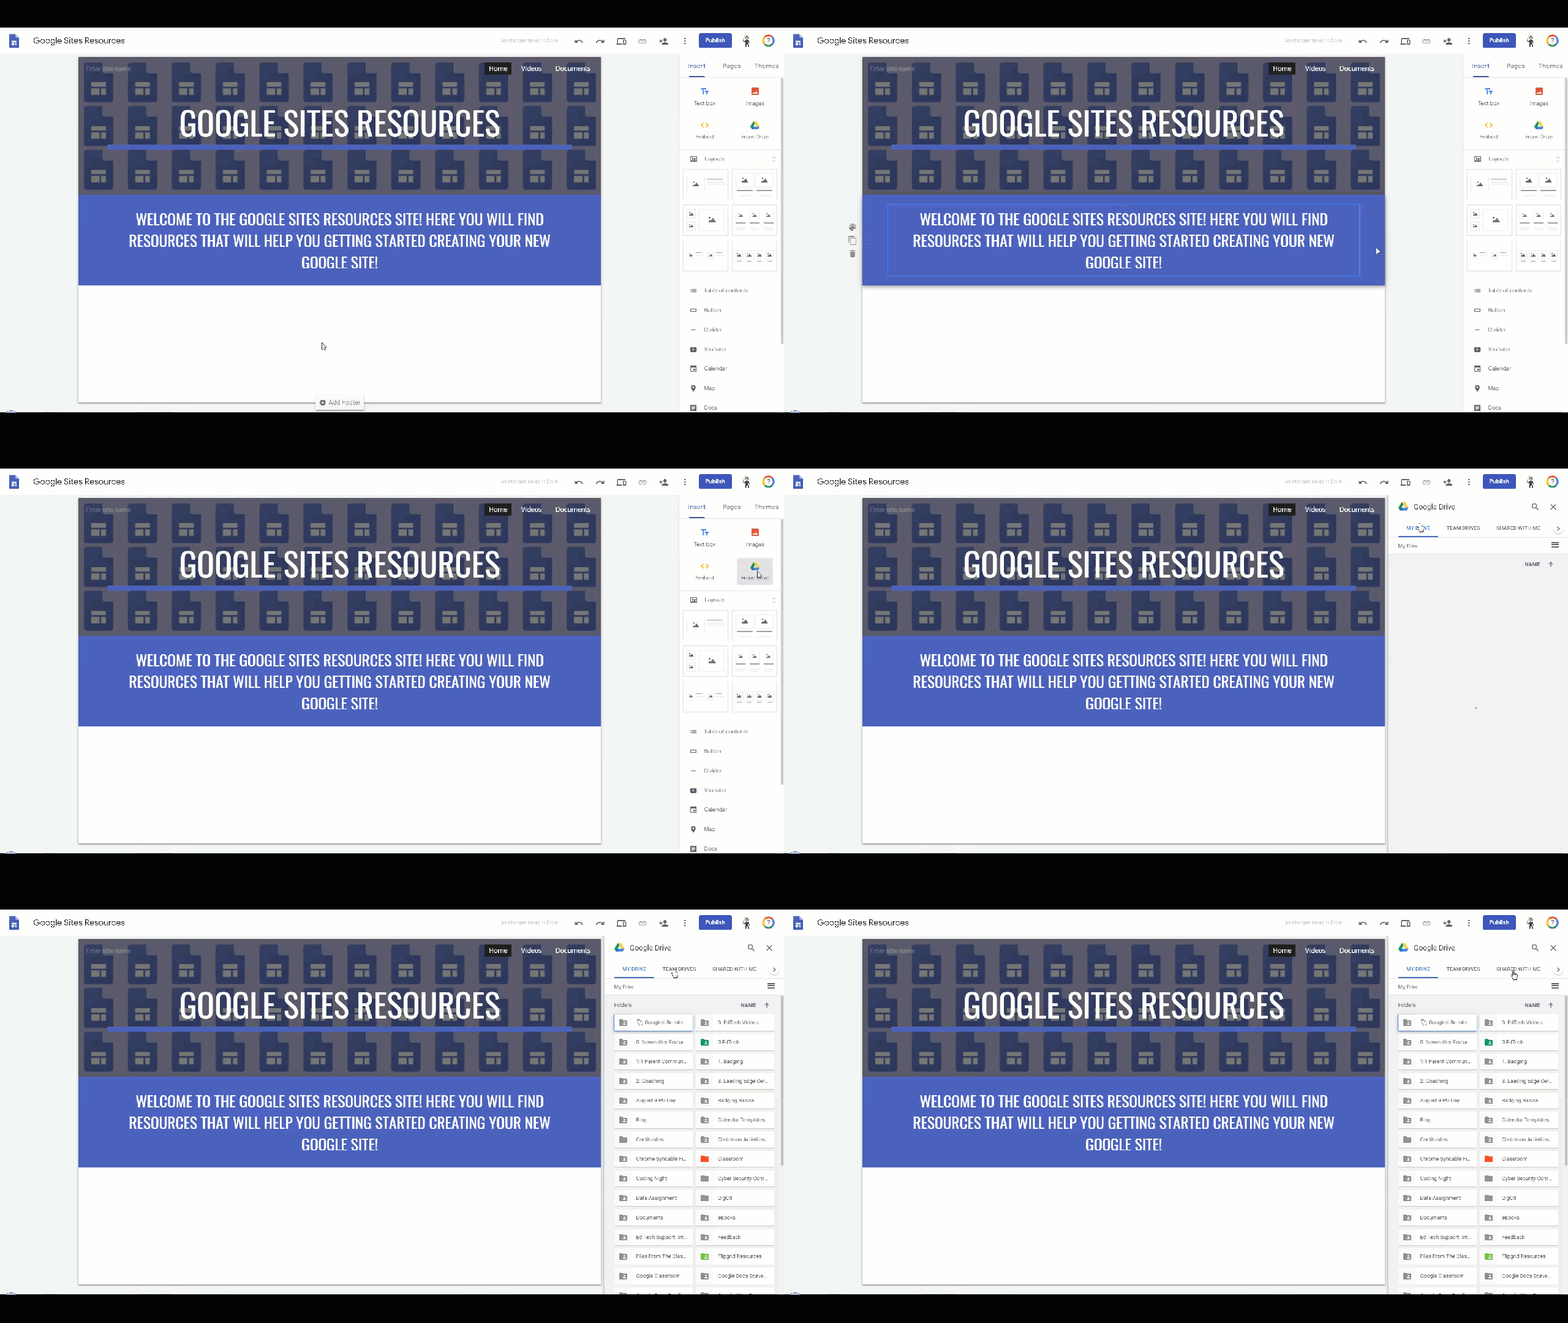
You will find the sections of where you can add content to your site on the right-hand side. The three sections are labels insert, pages, and themes. In the insert section, here is where you can find all the types of things you can add to your site like a text box, images, embed code, and items from your Drive.
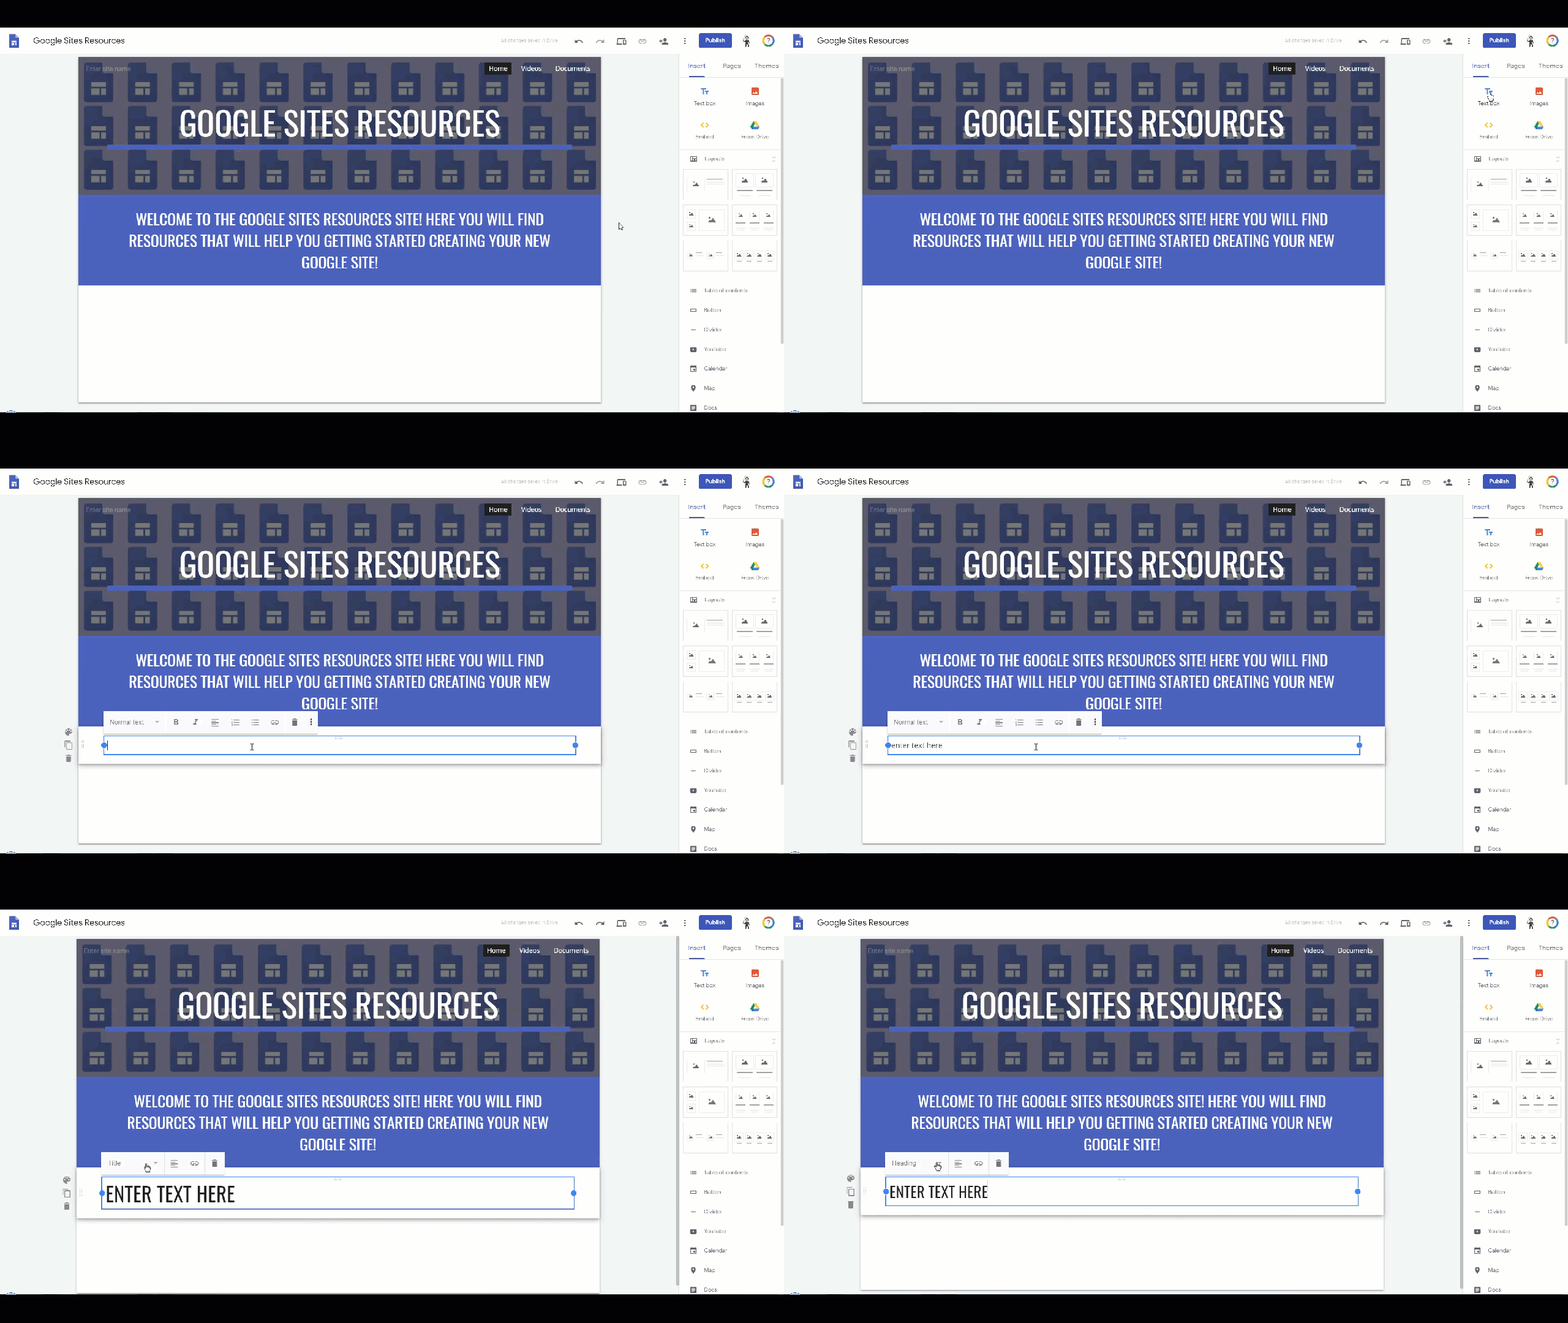
Inserting a Text Box
Clicking on text box will add a text box to your site. After adding it, you can customize the size of the text box, change the text format so it is either a title, heading, subheading, normal text, or small text. You can also adjust the alignment of your text and, depending on the format you chose, you can bold or italicize your text. You will also find our chain link again where you can highlight text and add a hyperlink.
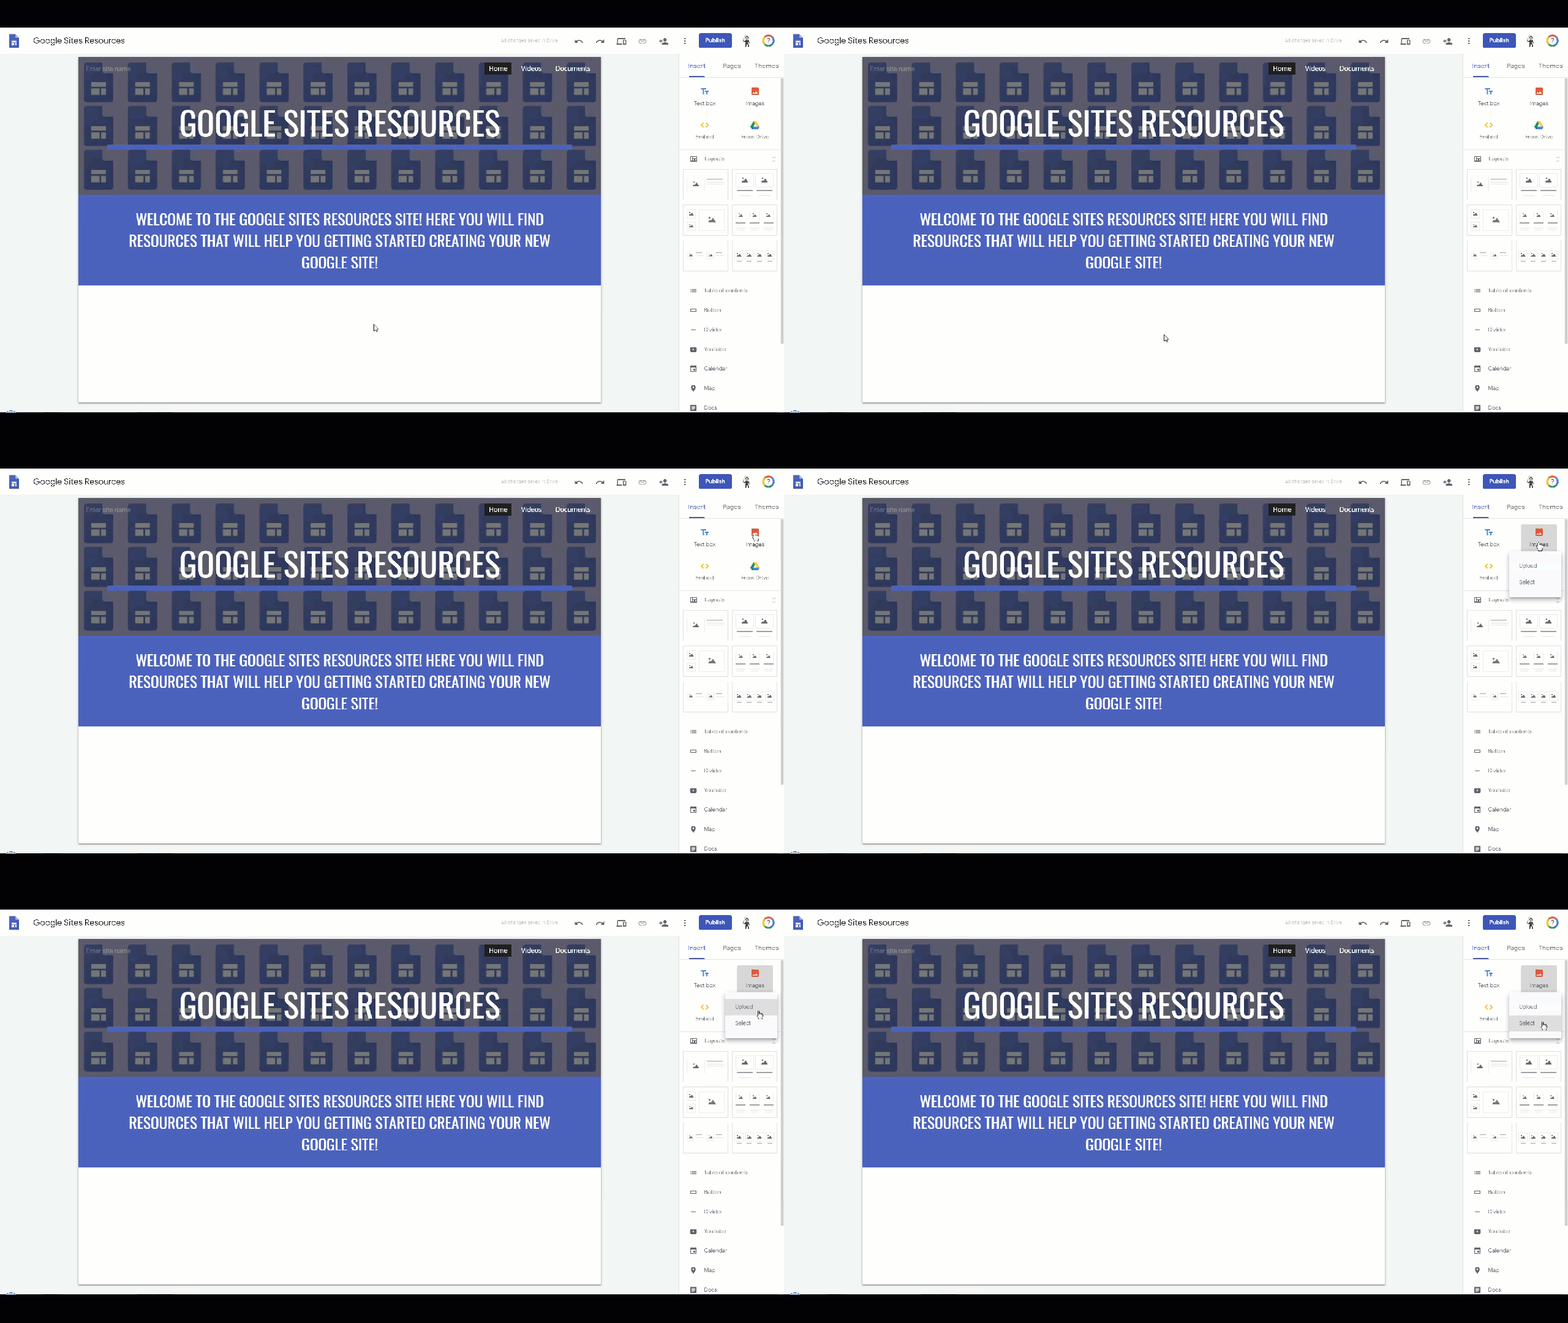
Inserting Images
Here you can either upload an image from your computer or select an image either from a URL, your album, your Google Drive or do a google image search.
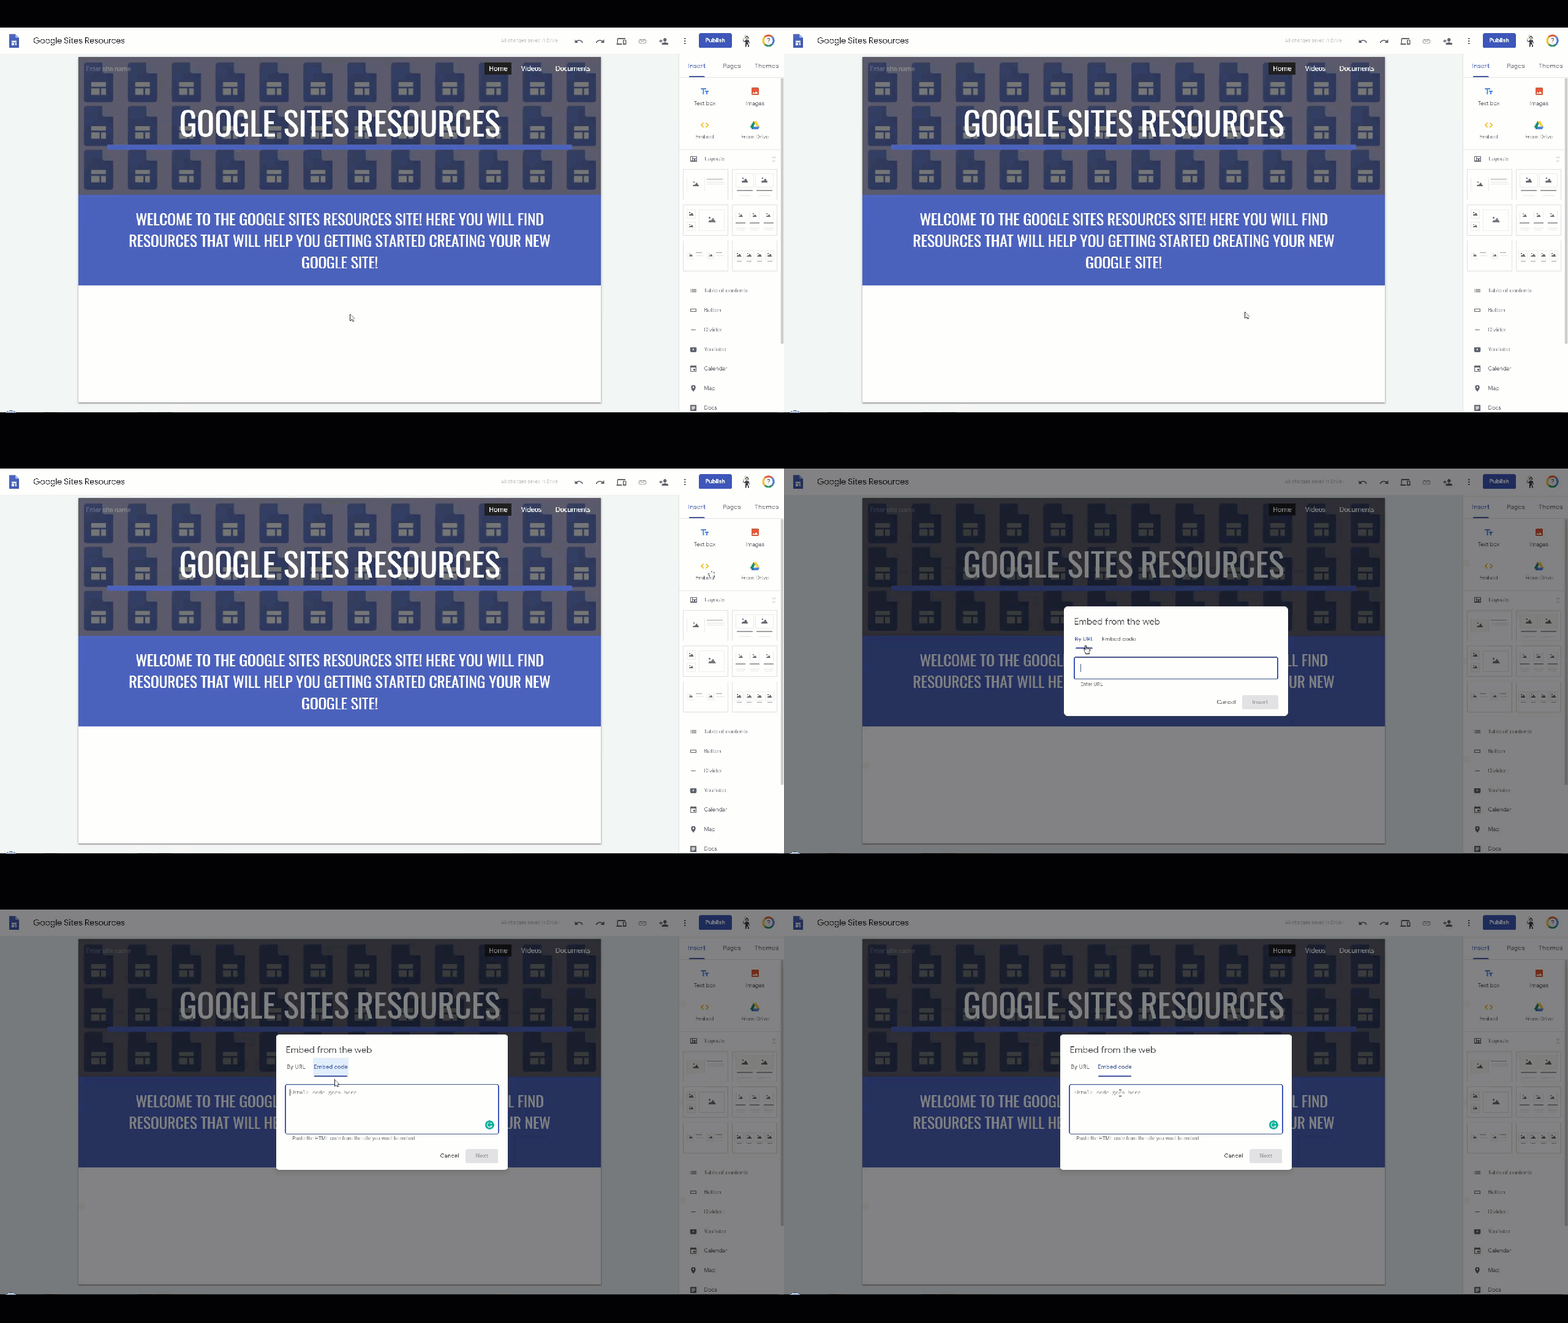
Embed Code
This is where you can embed HTML code for widgets and online players. For example, on the podcast website, I use the embed code for the Anchor podcast episode player to post the episode on the site so somebody could just click and play the episode right from the site.
From Drive
Here, you will be able to add items from your drive to your site.
Adding Pages to Site
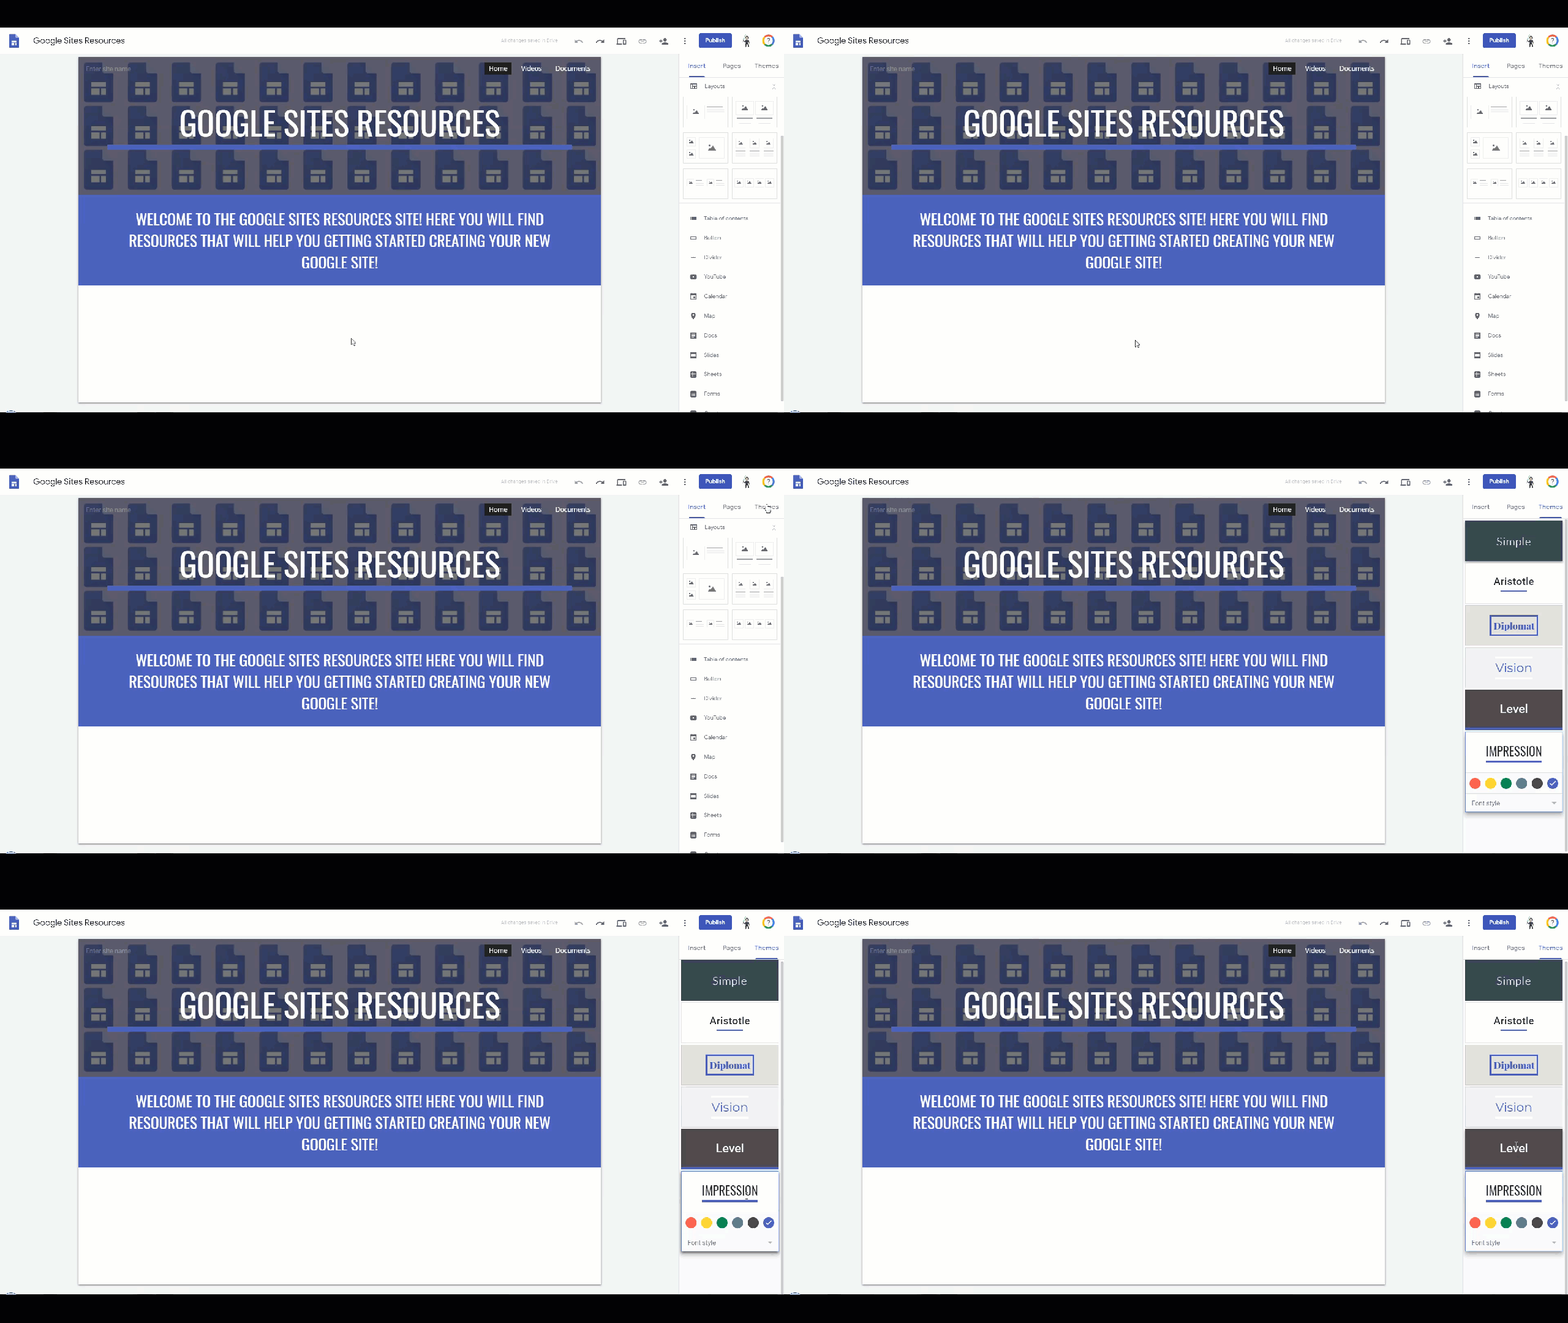
Themes
Monday, April 1, 2019
Updates to Google Classroom
Updates to Google Classroom: April 2019
Today, we are going to discuss Google Classroom. With all of the updates that have come to Google Classroom over the last few months, I thought we could dive into some of them.Stream vs Classwork
So the first updates we are going to discuss is the new Classwork tab in Google Classroom. Prior to the update, anything you posted in Google Classroom showed up in your stream. This made it hard for students to differentiate between something that is an assignment and something that was just an announcement or a question. That is now fixed. When you are wanting to post an announcement in your Google Classroom, you can do so straight from the stream. You will see a box right in the middle of your screen on the stream that says “share something with your class”. Click on that box and begin typing your announcement. Reusing a prior announcement could not be easier now. You will see the reuse button in that box. The reuse button is two arrows with one pointing to the right and the other point to the left. Click on that and you will be brought to all of your current and previous classes. Find an announcement you want to reuse, click on it, and hit the reuse button. Now to post an assignment in your classroom, you will now head to the classwork tab. Assignment post will still show up on the stream but now have an updates icon to go along with them. If you post an assignment, students will see that you posted an assignment with an icon that looks like a clipboard. If you post class materials, which we will get into later in the episode, students will see a post with an icon that looks like a book with a bookmark. If you post a question, students will see it with an icon which is a box with a question mark in the middle. These posts basically just show the title, icon, and date posted. These show up almost like quick updates the students can just check to see what is going on. Students can access assignments and whatnot from the stream or they can head to the classwork section. There they will find their assignments organized by the topic the teacher has created making it super easy to locate.
Organization with Topics
Topics, in general, have been in Classroom for a while, but the ability to truly organize your classroom with them is a huge update. Previously, when you would post an assignment in Google Classroom and attach a topic to it, you would see a list of your topics on the left-hand side. As a student, I could click on the topic name and it would then show me all of the assignments that had that topic tag but by default, my stream would still show everything in chronological order from the newest post at the top to the oldest post at the bottom. So you could kind of organize assignments, but it wasn't great. Now, when you create a topic in Google Classroom, it creates a section where all of the assignments with that topic tag will fall under that topic section. This is a much better visual organization system for students. To create a new topic, head on over to the Classwork tab, click the big create button in the top left-hand corner, and choose topic. From there, type out the name of the topic you wish to add to your classroom and then click add. If you have some assignments in your classroom and add a topic afterward, you can easily add the topic to an assignment that is already in your classroom. To do this, all you have to do is hover over an assignment and you will see the vertical ellipsis appear. This is the verticle three dots icon. From there you will click edit. You will then see a section in your assignment where you can add a topic. Choose your topic and click save. Your assignment will now be organized in that specific topic section.
Another way you can organize your topics is you can control the order in which they appear in the classwork section of google classroom. To do this, once you have created a topic, click on the verticle ellipsis and choose the option of move up or move down.
Friday, December 21, 2018
Checking for Understanding: Five Ways to Collect Data and Allow Students to Have Fun While Doing So
Quizizz
Once you have your quiz create and are ready to administer it, there are a few ways that you can do that:
2. Homework: In this mode, teachers can assign a Quizizz quiz as homework whether it be by giving the students the direct link to the quiz, or you can assign it through Google Classroom. With the Homework option, you have the ability to set the closing date and time. Just like in Live Mode, you can shuffle questions, shuffle answer options, give the ability to show answers after questions, and show quiz review which shows students all the questions after the game. You also have the ability to show the leaderboard, question timer, play music, and the part the students really get excited about show memes after each question. The memes change depending on if they get the question correct or not.
Once students have started taking the quiz, you can track their progress in real time. Once the class is finished, you are able to see the results of the quiz either by student or by question. Looking at the results by question is a great way to get a quick overview of how the class did and if there are any areas that you need to focus on. Results can either be downloaded or if the quiz was assigned through Google Classroom, the grades can be automatically imported into Google Classroom.
Quizlet Live
Upgrading your Quizlet account allows you to gain valuable insight into your classes performance. Upgrading to Quizlet Teacher account allows you to track student progress, see the most missed questions, and view progress over time.
Flipgrid
Seesaw
Edpuzzle
Wednesday, December 5, 2018
Easily Access Comments in Google Classroom Comment Bank
Hopefully, this tip will save you time and make giving feedback to students a more enjoyable endeavor.